
(Update Jan 2021: Bitnami has made available a new tool bncert which makes it even easier to enable HTTPS with a Let’s Encrypt certificate; the instructions below using Let’s Encrypt’s certbot still work but I would recommend people looking to enable HTTPS to use Bitnami’s new bncert process)
I recently made two big changes to the backend of this website to keep up with the times as internet technology continues to evolve.
First, I migrated from my previous web hosting arrangements at WebFaction to Amazon Web Services’s new Lightsail offering. I have greatly enjoyed WebFaction’s super simple interface and fantastic documentation which seemed tailored to amateur coders like myself (having enough coding and customization chops to do some cool projects but not a lot of confidence or experience in dealing with the innards of a server). But, the value for money that AWS Lightsail offers ($3.50/month for Linux VPS including static IP vs. the $10/month I would need to pay to eventually renew my current setup) ultimately proved too compelling to ignore (and for a simple personal site, I didn’t need the extra storage or memory). This coupled with the deterioration in service quality I have been experiencing with WebFaction (many more downtime email alerts from WordPress’s Jetpack plugin and the general lagginess in the WordPress administrative panel) and the chance to learn more about the world’s pre-eminent cloud services provider made this an easy decision.
Given how Google Chrome now (correctly) marks all websites which don’t use HTTPS/SSL as insecure and Let’s Encrypt has been offering SSL certificates for free for several years, the second big change I made was to embrace HTTPS to partially modernize my website and make it at least not completely insecure. Along the way, I also tweaked my URLs so that all my respective subdomains and domain variants would ultimately point to http://benjamintseng.com/.
For anyone who is also interested in migrating an existing WordPress deployment on another host to AWS Lightsail and turning on HTTPS/SSL, here are the steps I followed (gleamed from some online research and a bit of trial & error). Its not as straightforward as some other setups, but its very do-able if you are willing to do a little bit of work in the AWS console:
- Follow the (fairly straightforward) instructions in the AWS Lightsail tutorial around setting up a clean WordPress deployment. I would skip sub-step 3 of step 6 (directing your DNS records to point to the Lightsail nameservers) until later (when you’re sure the transfer has worked so your domain continues to point to a functioning WordPress deployment).
- Unless you are currently not hosting any custom content (no images, no videos, no Javascript files, etc) on your WordPress deployment, I would ignore the WordPress migration tutorial at the AWS Lightsail website (which won’t show you how to transfer this custom content over) in favor of this Bitnami how-to-guide (Bitnami provides the WordPress server image that Lightsail uses for its WordPress instance) which takes advantage of the fact that the Bitnami WordPress includes the All-in-One WP Migration plugin which, for free, can do single file backups of your WordPress site up to 512 MB (larger sites will need to pay for the premium version of the plugin).
- If, like me, you have other content statically hosted on your site outside of WordPress, I’d recommend storing it in WordPress as part of the Media Library which has gotten a lot more sophisticated over the past few years. Its where I now store the files associated with my Projects
- Note: if, like me, you are using Jetpack’s site accelerator to cache your images/static file assets, don’t worry if upon visiting your site some of the images appear broken. Jetpack relies on the URL of the asset to load correctly. This should get resolved once you point your DNS records accordingly (literally the next step) and any other issues should go away after you mop up any remaining references to the wrong URLs in your database (see the bullet below where I reference the Better Search Replace plugin).
- If you followed my advice above, now would be the time to change your DNS records to point to the Lightsail nameservers (sub-step 3 of step 6 of the AWS Lightsail WordPress tutorial) — wait a few hours to make sure the DNS settings have propagated and then test out your domain and make sure it points to a page with the Bitnami banner in the lower right (sign that you’re using the Bitnami server image, see below)
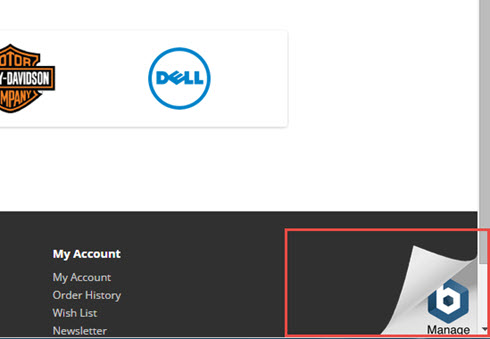
- To remove that ugly banner, follow the instructions in this tutorial (use the AWS Lightsail panel to get to the SSH server console for your instance and, assuming you followed the above instructions, follow the instructions for Apache)
Assuming your webpage and domain all work (preferably without any weird uptime or downtime issues), you can proceed with this tutorial to provision a Let’s Encrypt SSL certificate for your instance. It can be a bit tricky as it entails spending a lot of time in the SSH server console (which you can get to from the AWS Lightsail panel) and tweaking settings in the AWS Lightsail DNS Zone manager, but the tutorial does a good job of walking you through all of it.(Update Jan 2021: Bitnami has made available a new toolbncertwhich makes it even easier to enable HTTPS. While the link above using Let’s Encrypt’scertbotstill works, I would recommend people use Bitnami’s newbncertprocess going forward)- I would strongly encourage you to wait to make sure all the DNS settings have propagated and that your instance is not having any strange downtime (as mine did when I first tried this) as if you have trouble connecting to your page, it won’t be immediately clear what is to blame and you won’t be able to take reactive measures.
- I used the plugin Better Search Replace to replace all references to intermediate domains (i.e. the IP addresses for your Lightsail instance that may have stuck around after the initial step in Step 1) or the non-HTTPS domains (i.e. http://yourdomain.com or http://www.yourdomain.com) with your new HTTPS domain in the MySQL databases that power your WordPress deployment (if in doubt, just select the wp_posts table). You can also take this opportunity to direct all your yourdomain.com traffic to www.yourdomain.com (or vice versa). You can also do this directly in MySQL but the plugin allows you to do this across multiple tables very easily and allows you to do a “dry run” first where it finds and counts all the times it will make a change before you actually execute it.
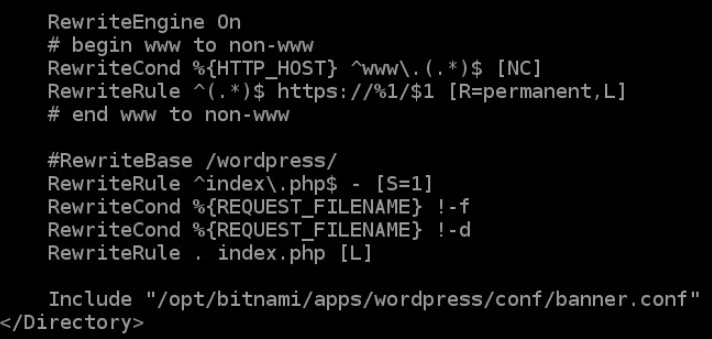
- (Update Jan 2021: Bitnami has made available a new tool
bncertwhich makes it even easier to enable HTTPS and also automatically handles the redirect. While the instructions below still technically work, I would just use Bitnami’s newbncertprocess going forward)If you want to redirect all the traffic to www.yourdomain.com to yourdomain.com, you have two options. If your domain registrar is forward thinking and does simple redirects for you like Namecheap does, that is probably the easiest path. That is sadly not the path I took because I transferred my domain over to AWS’s Route 53 which is not so enlightened. If you also did the same thing / have a domain registrar that is not so forward thinking, you can tweak the Apache server settings to achieve the same effect. To do this, go into the SSH server console for your Lightsail instance and:Run cd ~/apps/wordpress/confTo make a backup which you can restore (if you screw things up) run mv httpd-app.conf httpd-app.conf.oldI’m going to use the Nano editor because its the easiest for a beginner (but feel free to use vi or emacs if you prefer), but run nano httpd-app.confUse your cursor and find the line that says RewriteEngine On that is just above the line that says #RewriteBase /wordpress/Enter the following lines# begin www to non-wwwRewriteCond %{HTTP_HOST} ^www\.(.*)$ [NC]RewriteRule ^(.*)$ https://%1/$1 [R=permanent,L]# end www to non-wwwThe first and last line are just comments so that you can go back and remind yourself of what you did and where. The middle two lines are where the server recognizes incoming URL requests and redirects them accordinglyWith any luck, your file will look like the image below — hit ctrl+X to exit, and hit ‘Y’ when prompted (“to save modified buffer”) to save your work
Run sudo /opt/bitnami/ctlscript.sh restart to restart your server and test out the domain in a browser to make sure everything worksIf things go bad, run mv httpd-app.conf.old httpd-app.conf and then restart everything by running sudo /opt/bitnami/ctlscript.sh restart
I’ve only been using AWS Lightsail for a few days, but my server already feels much more responsive. It’s also nice to go to my website and not see “not secure” in my browser address bar (its also apparently an SEO bump for most search engines). Its also great to know that Lightsail is integrated deeply into AWS which makes the additional features and capabilities that have made AWS the industry leader (i.e. load balancers, CloudFront as CDN, scaling up instance resources, using S3 as a datastore, or even ultimately upgrading to full-fledged EC2 instances) are readily available.
Leave a Reply