(Note: this is part of my ongoing series on cheaply selfhosting)
If you’ve been following my selfhosting journey, you’ll know that I host some web applications — among them, network storage for my family, tools for working with PDFs, media streamers, a newsreader, etc. — from an inexpensive home server on my home network. It’s mostly a fun hobby but it’s helped teach me a great deal about web applications and Docker containers, and has helped me save some time and money by having applications I can control (and offer).
But one of the big questions facing every self-hoster is how to access these applications securely when I’m not at home? This is a conundrum as the two traditional options available have major tradeoffs
- Opening up ports to the internet — One way to do this is to open up ports on your internet router and to forward traffic to those ports to your server. While this is the most direct solution to the problem of granting access to your hosted applications, this has several issues
- First, some internet service providers and routers don’t actually let you do this!
- Second, by opening up a port on your router, you’ll be opening up a door for everyone on the internet to access. This could expose your home network to malicious actors, and requires you to either accept the risk or set up additional security mechanisms to protect yourself.
- Third, unless your internet service provider has granted you a static IP address (which is relatively rare for consumer internet plans), the IP address of your home will randomly change. Therefore in order to access your home server, you’ll need to setup a Dynamic DNS service which adds additional complexity to manage.
- VPNs or VPN-like solutions (Twingate, Tailscale, etc) — The alternative to opening up a port is to leverage VPN and VPN-like technologies. This is much more secure (and, in fact, I use Twingate, a great VPN-like service, for this type of secure remote access). But, this has one major downside: it requires each device that wants to access your hosted applications to have a special client installed. This can be a hassle (especially if you want to grant access to someone less tech-savvy), and, in some cases, near impossible (if you’re dealing with devices like a connected TV or eReader or if the device is behind a firewall that doesn’t like VPNs).
I wanted a third option that:
- would work nicely and securely with practically any internet-connected device
- didn’t require client installation or configuration
- didn’t require me to open up any new ports on my home router or expose a public IP address
- could integrate authentication (as an extra layer of security)
That’s how I landed on Cloudflare tunnels!
Cloudflare Tunnels
Enter Cloudflare Tunnels, a product in the Cloudflare Zero Trust family of offerings. By running a small piece of software called cloudflared on your home network (i.e. as a Docker container on your home server), you can link:
- the services/resources on your home network
- domains hosted and secured by Cloudflare
- third party authentication services (like Google login)
What that means is my local Stirling PDF tools (which live on my home server at the domain pdf.home) can now be reached by any internet-connected device at https://pdf.[mydomain.com] while locked behind a Google login which only allows users with specific email addresses through (i.e. my wife and myself)! All for free!
How to Setup
Transferring Your Domains
To get started, transfer your domains to Cloudflare. The specific instructions for this will vary by domain registrar (see some guidelines from Cloudflare). While you can technically just change the nameservers, I would highly recommend fully transferring your domains to Cloudflare for three reasons
- Cost: Cloudflare (as of this writing) offers at-cost domain registration. This means they don’t add any markup on top of what it costs to actually register the domain and so it’s typically cheaper to buy and renew domains with Cloudflare
- Security: Cloudflare offers free and automatic HTTPS protection on all domains and basic DDOS protection as well
- Extra Configurable Protection: I am not a cybersecurity expert but Cloudflare, even on their free tier, offer generous protection and domain features that you can further customize: bot protection, analytics, a sophisticated web application firewall, etc.
Creating the Tunnel
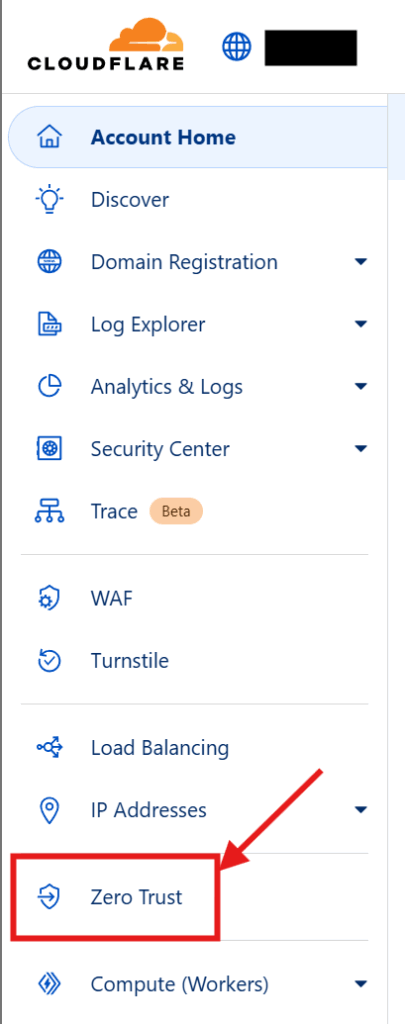
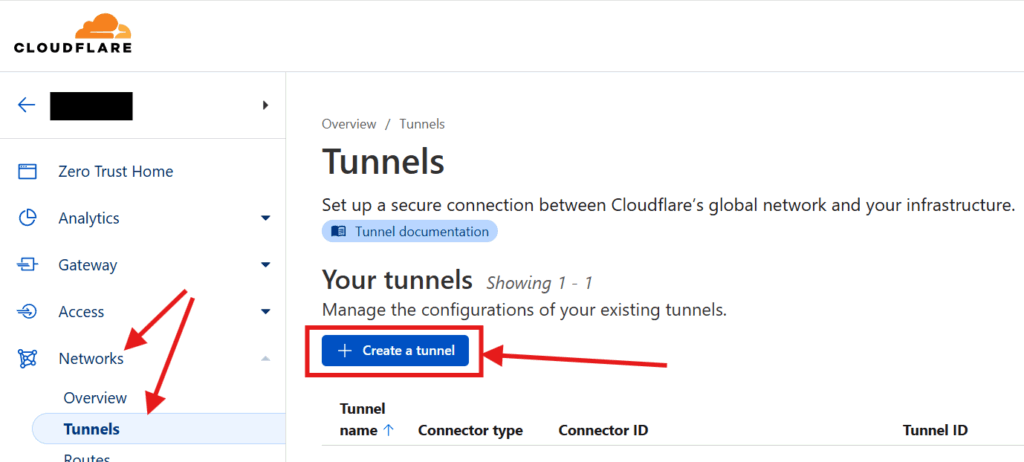
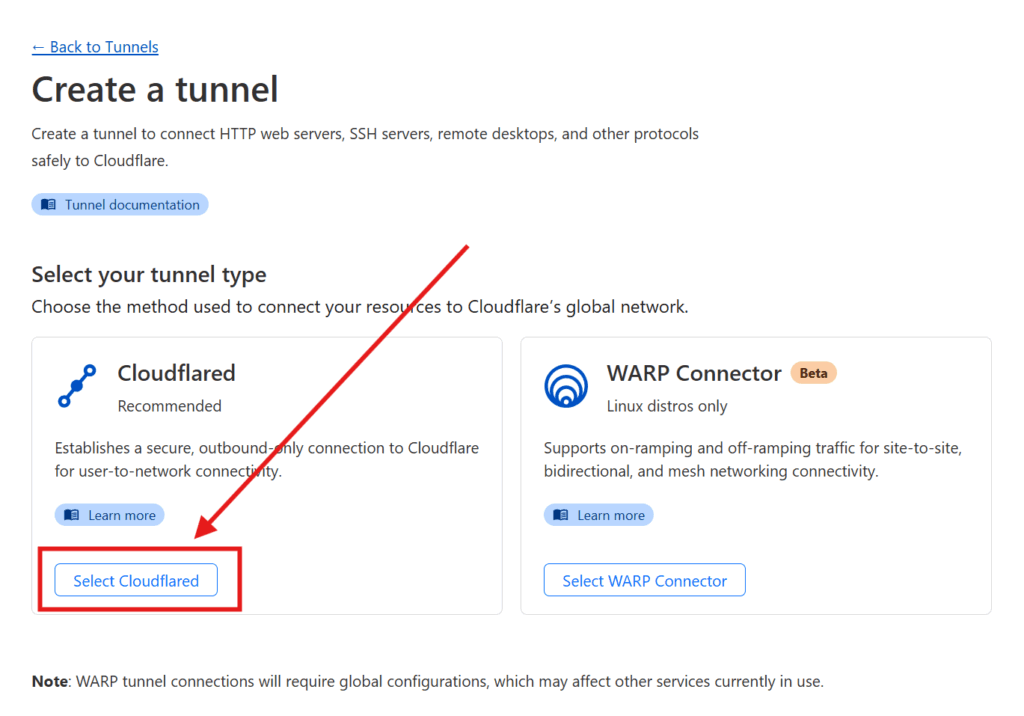
Once you have your domains transferred to Cloudflare, go into your Cloudflare dashboard and create your tunnel. Start by clicking on Zero Trust on the sidebar. Then go to Networks > Tunnels and click on Create Tunnel
Select the Cloudflared option
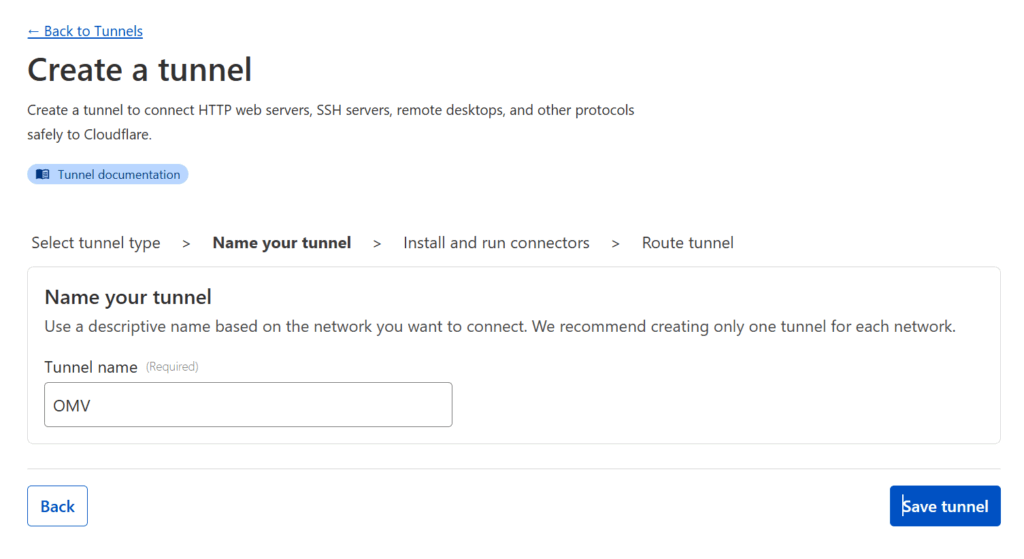
You will be asked to name your connector — pick any name that suits you, I went with OMV (since my homeserver is an OpenMediaVault server).
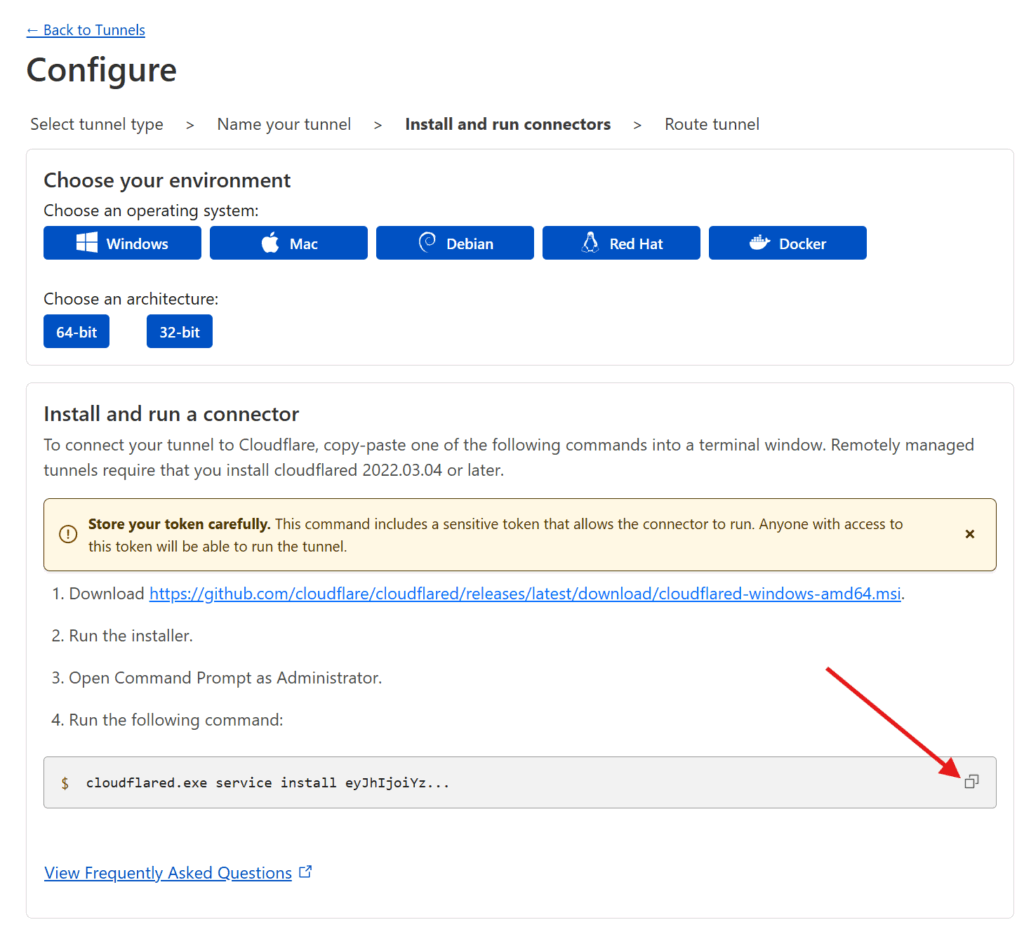
Then copy the installation command. Paste it somewhere and extract the really long token that starts with “ey…” as you’ll need it for the next step.
Setting up Cloudflared
Set up cloudflared. The following are instructions for OpenMediaVault. Depending on your home server setup, you may need to do different things to get a Docker container up and running using Docker compose but the Docker compose file and the general order of operations should match. Assuming you use OpenMediaVault…
- If you haven’t already, make sure you have OMV Extras and Docker Compose installed (refer to the section
Docker and OMV-Extrasin my previous post, you’ll want to follow all 10 steps as I refer to different parts of the process throughout this post) and have a static local IP address assigned to your server. - Login to your OpenMediaVault web admin panel, and then go to
[Services > Compose > Files]in the sidebar. Press the button in the main interface to add a new Docker compose file.
UnderNameput downcloudflaredand underFile, adapt the following. Copy the token from the installation command
services:
  cloudflared:
    image: cloudflare/cloudflared
    container_name: cloudflare-tunnel
    restart: unless-stopped
    command: tunnel run
    environment:
      - TUNNEL_TOKEN={{the long token from before that starts with ey...}}
Code language: Dockerfile (dockerfile)- Once you’re done, hit
Saveand you should be returned to your list of Docker compose files. Notice that the newCloudflaredentry you created has aDownstatus, showing the container has yet to be initialized. - To start your Duplicati container, click on the new
Cloudflaredentry and press the (up) button. This will create the container, download any files needed, and run it.
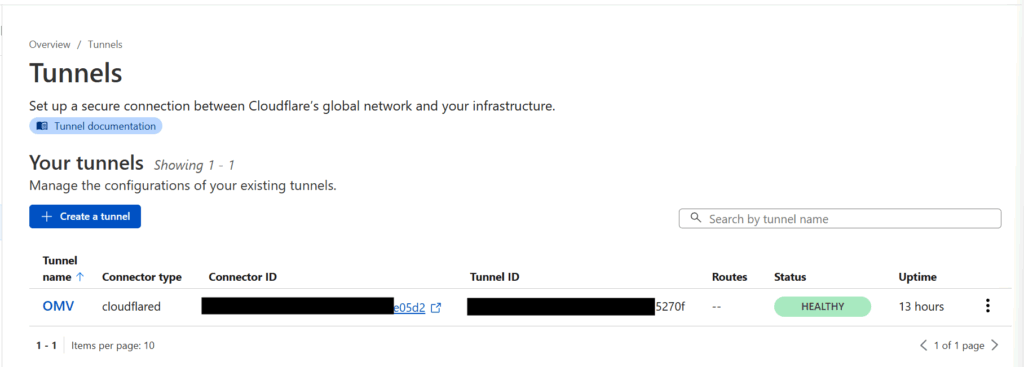
Go back to your Cloudflare Zero Trust dashboard and click on Networks > Tunnels. If your Docker container worked, you should see a HEALTHY status showing that your Cloudflared container is up and running and connected to Cloudflare
Connecting your Services to the Tunnel
Click on your now active tunnel in the Cloudflare interface and click on Edit (or use the three-dot menu on the right hand side and select Configure) and then click on the Public Hostnames tab at the top. Press the Add a public hostname button.

For each service you want to make available, you will need to enter:
- The
Domainyou wish to use (and have transferred to Cloudflare)- The
Subdomainyou want to map that service to — if the domain you wish to use isexample.com, an example subdomain would besubdomain.example.com. If you leave this blank, it will map the “naked” domain (in this caseexample.com) - The
Pathyou want to map the service to — if the domain and subdomain issubdomain.example.comand you add a path/path, then the service would be mapped tosubdomain.example.com/path
- The
- The
Typeof service — Cloudflare will map many different types of resources, but chances are it’ll beHTTP. - The
URLof the service relative to your network — this is the IP address (including port) that you use within your network. For example:192.168.85.22:5678(assuming your home server’s local IP is 192.168.85.22 and the port the service you want to link is set to 5678)
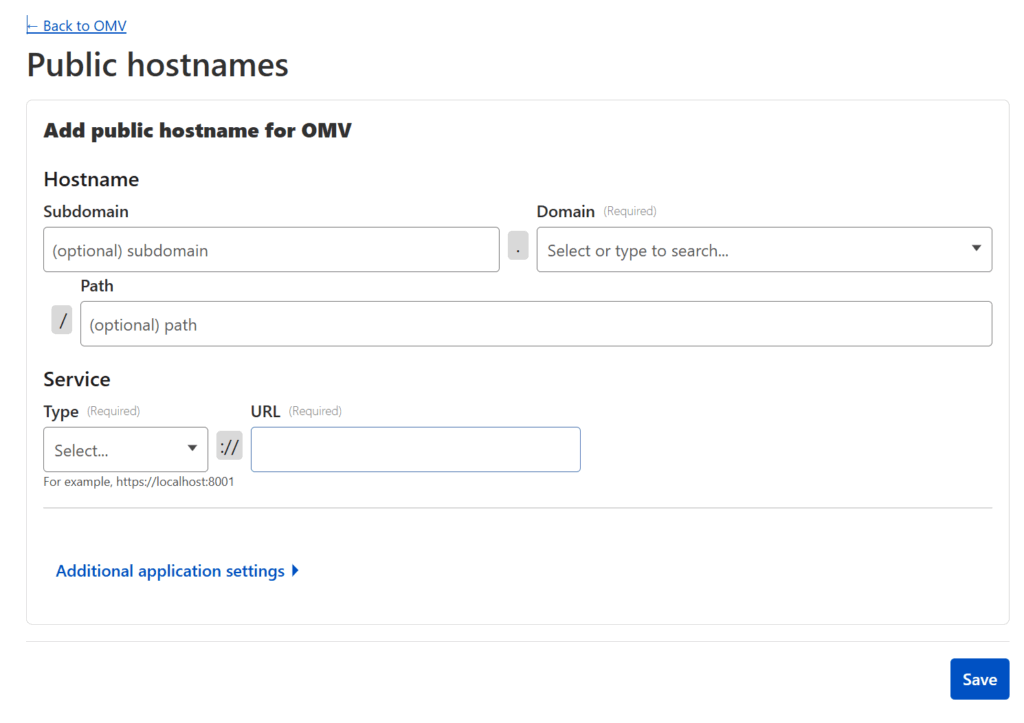
Press Save once you’re done and go ahead and test the subdomain/domain/path you just added (i.e. go to https://subdomain.example.com/path). It should take you straight to your application, except now it’s through a publicly accessible URL secured behind Cloudflare SSL!
Suggestions on Service Configuration
You need to repeat the above process for every selfthosted application that you want to make publicly available. Some suggestions based on what I did:
- I made public every service I host with a few exceptions related to security, such as:
- The OpenMediaVault console & WeTTY — Since this controls my entire home server setup (and grants access to all my network attached storage), it felt a little too important to make it easy to access (at least not without a VPN-like solution like the one I use, Twingate)
- The PiHole administrative console — Similarly, because my PiHole is so vital to how the internet functions on my home network and regulates DNS in my home, it felt like locking this behind Twingate was reasonable
- The NAS — As there are important and sensitive files on the OpenMediaVault file server, this was again one of the things where security trumped expediency.
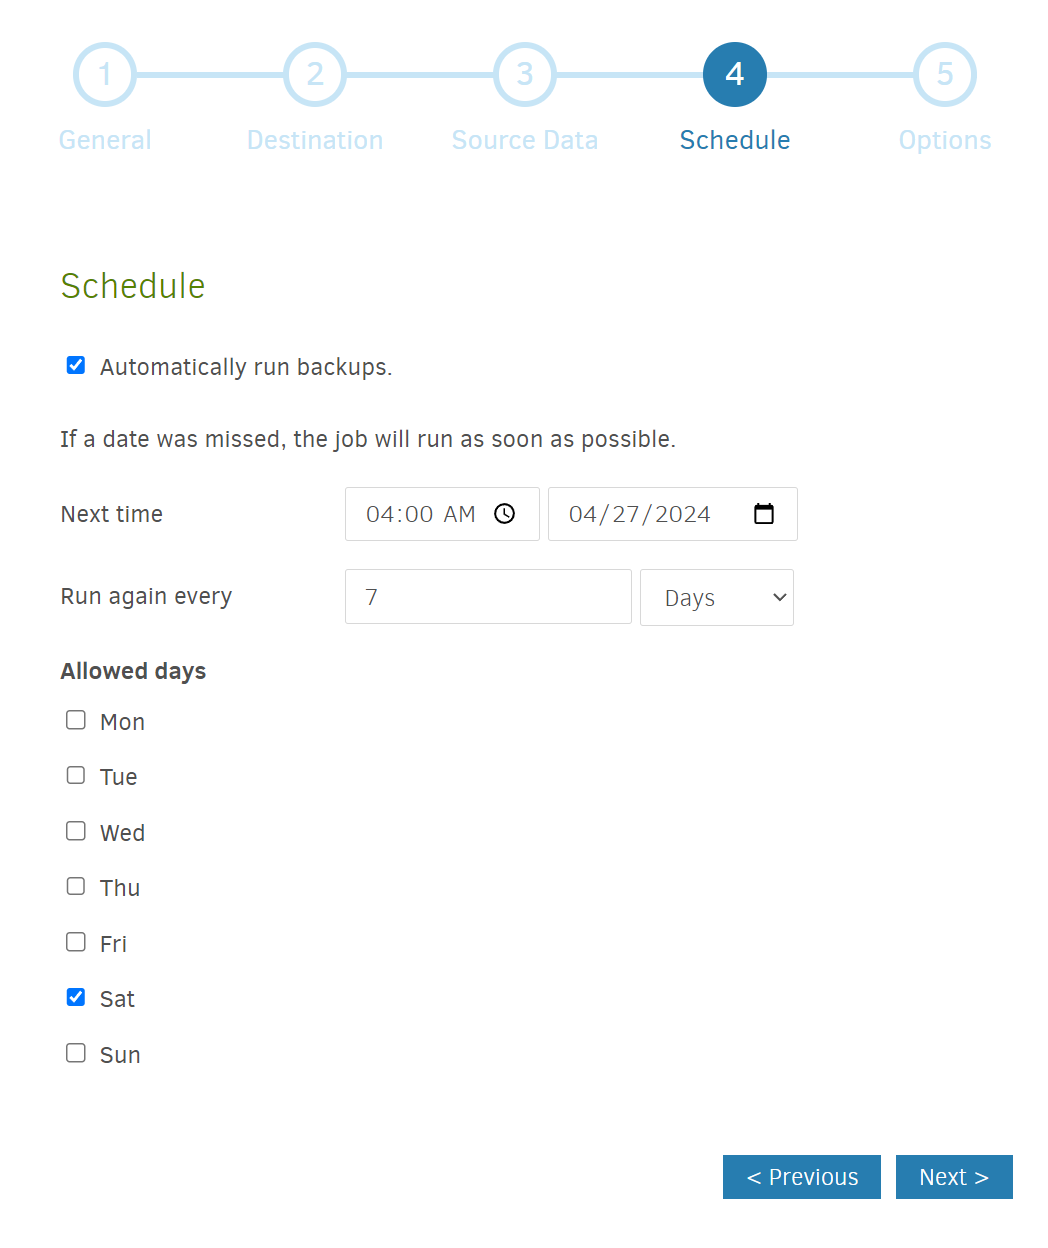
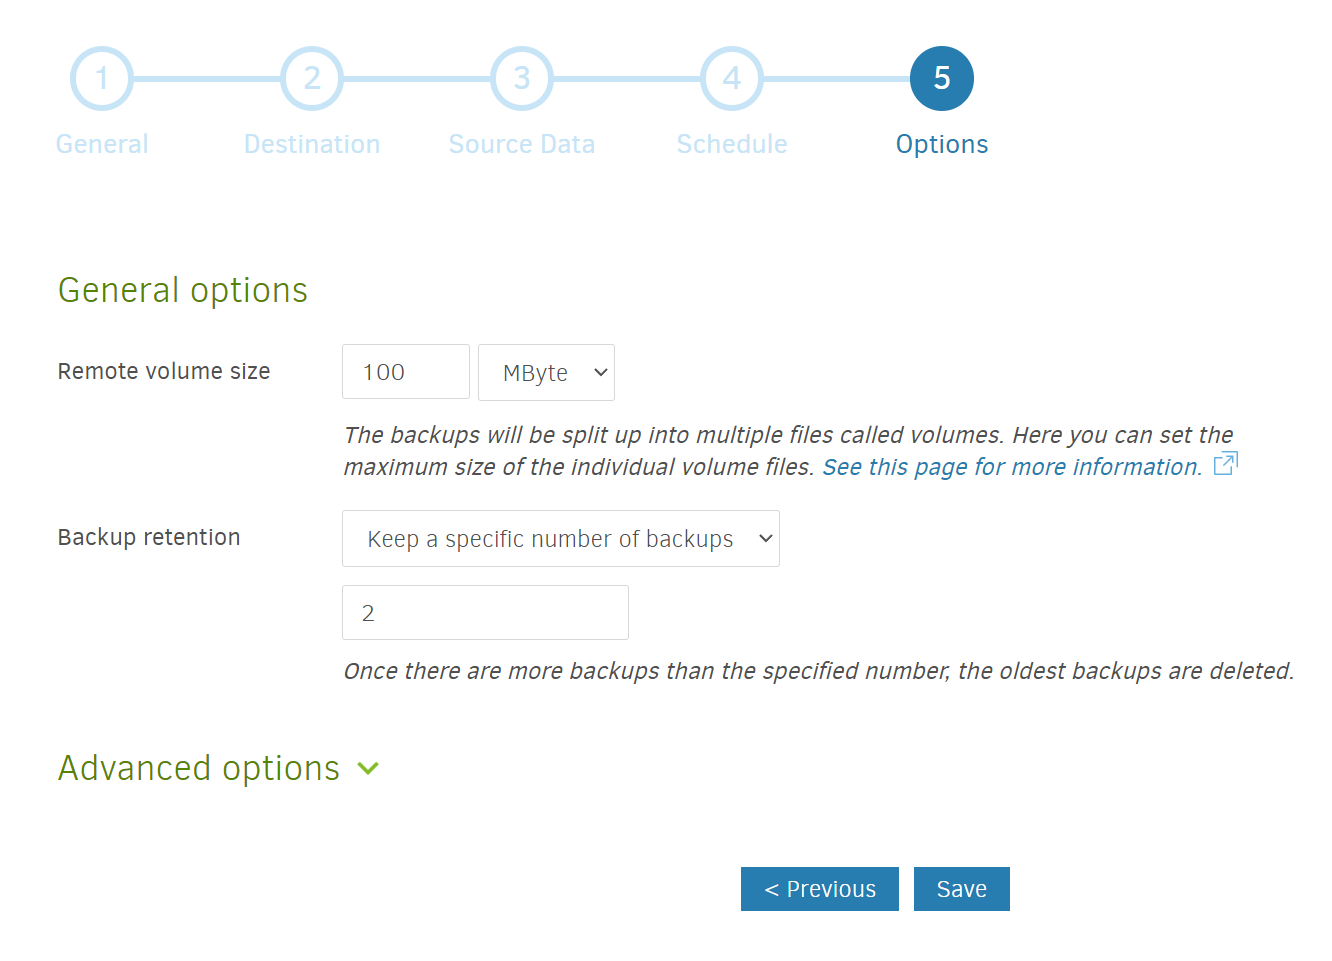
- Duplicati — I was less concerned about security here, but Duplicati is largely a “set it and forget it” type of backup tool, so it felt like there was little benefit to make this publicly available (and only potential risks)
- The Ubooquity Admin interface — I’m again not super concerned about security here, but I have rarely needed to use it, so it didn’t make sense to add to my “surface area of attack” by exposing this as well
- For a media server like Plex (or Jellyfin or Emby), you don’t have to, but I’d encourage you to connect two domains:
- One that is easily memorable by you (i.e.
plex.yourdomain.com) for you to access via browser over HTTPS and protected by authentication and access control (see later in the post for how to configure) - One that has a long, hard-to-guess subdomain (i.e.
hippo-oxygen-face.yourdomain.com) that will still be served over HTTPS but will not be protected by authentication. This will allow access to devices like smart TVs and the Plex clients which do not expect the servers to have additional authentication on top of them.
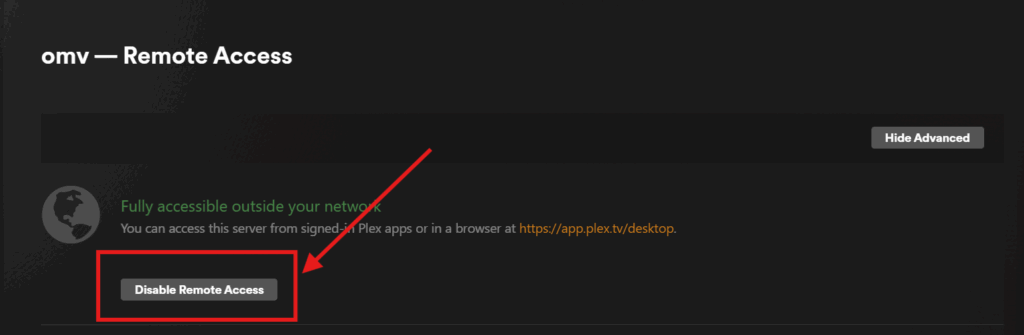
Under your server settings (not Plex Web or your account settings which are above), go toSettings>Remote Accessand press theDisable Remote Accessbutton. This disables Plex’s built-in Relay feature which, while reasonably functional, is not under your control and limited in bandwidth / typically forces your server to transcode more than necessary
To allow Plex apps (such as those on a TV or smartphone) to access your server, you’ll need to let Plex know what the right URL is. To do that go toSettings > Networkand scroll down toCustomer server access URLs. Here you’ll enter your hard-to-guess subdomain (i.e.https://hippo-oxygen-face.yourdomain.com) and pressSave Changes. This informs Plex (and therefore all Plex clients) where to look for your media server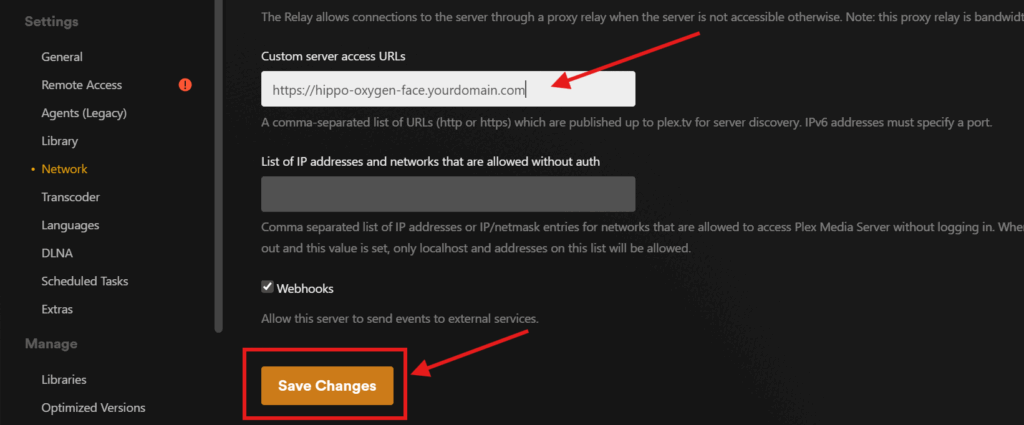
To confirm it all works, login to your Plex account at https://app.plex.tv/ and confirm that your server shows up (you may have to wait the first time you do this as Plex connects to your server).
Because this approach does NOT have extra access control and authentication, and because there are malicious actors who scan the internet for unguarded media server domains, it’s important that your subdomain here be long and hard-to-guess. - One that is easily memorable by you (i.e.
Authentication and Access Control
Because Cloudflare Tunnels are part of Cloudflare’s enterprise offering to help IT organizations make their applications secure & accessible, it comes with authentication support and access controls built-in for any application connected to your Cloudflare tunnel. This means you can easily protect your web applications against unwanted access.
To set this up, log back in to the Cloudflare dashboard, go to Zero Trust, and then go to Access > Policies in the sidebar and press the Add a policy button.

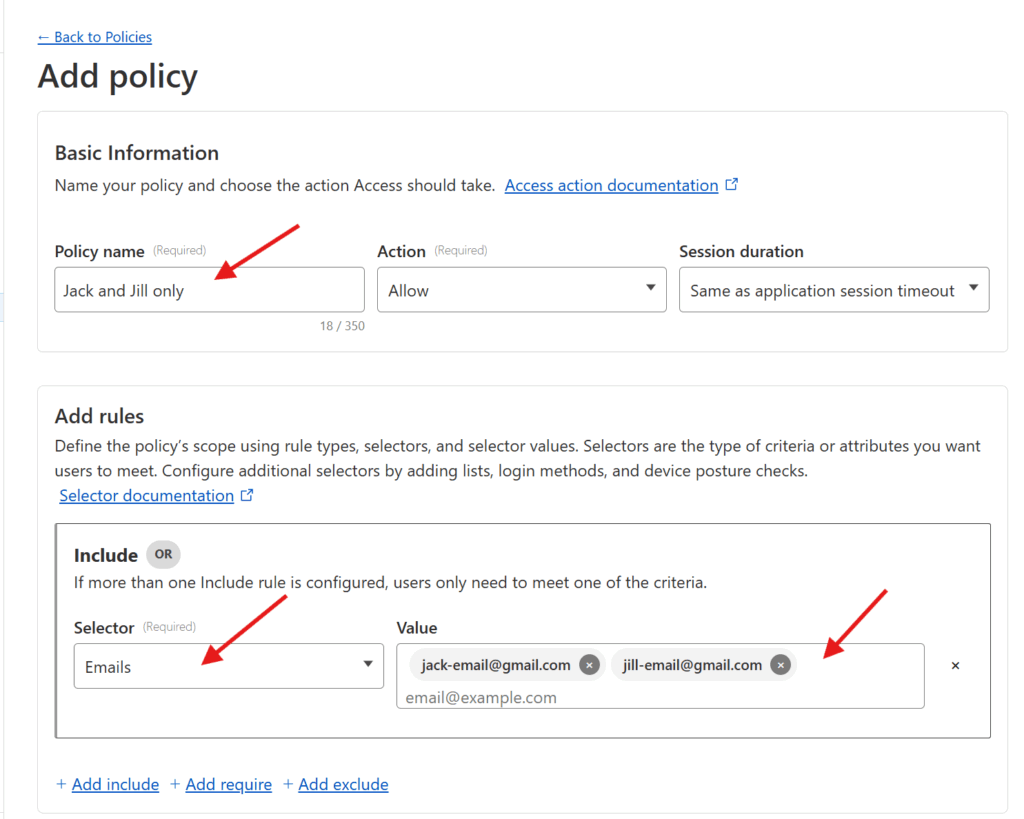
Enter a Policy name (pick something that describes how you’re restricting access, like “Jack and Jill only“).
You can then add the specific rules that govern the policy. Cloudflare supports a wide range of rules (including limiting based on IP address, country, etc), but assuming you just want to restrict access to specific individuals, I’d pick Emails under Selector and add the emails of the individual who are being granted access under Value. Once you’re set, press the Save button at the bottom!
Now you have a policy which can restrict a given application only to users with specific email addresses 🙌🏻.
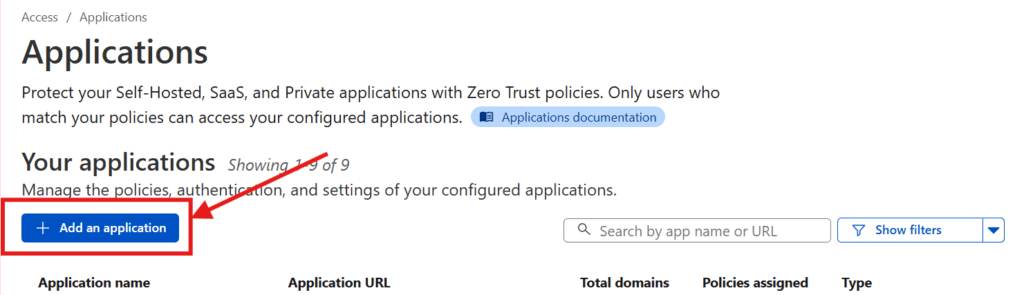
Now, we just need to set up Cloudflare to apply that policy (and a specific login method) to the services in question. To do that, in the Cloudflare Zero Trust dashboard, go to Access > Applications in the sidebar and press the Add an application button in the screen that comes up.
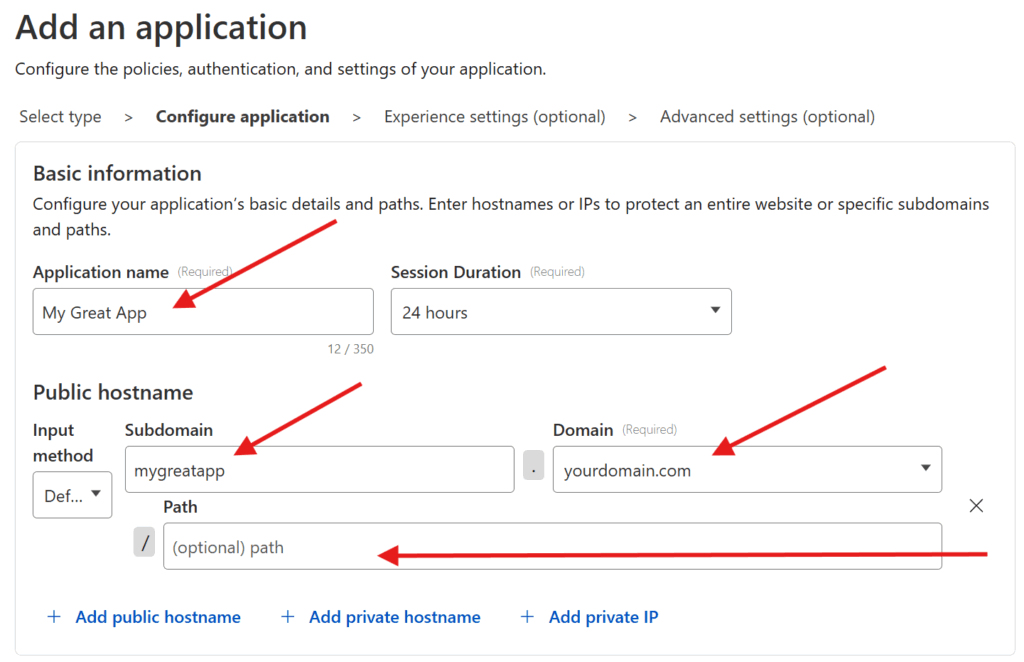
Select the Self-hosted option. And then enter your Application name. Press the Add public hostname button and enter in the Subdomain, Domain, and Path for your previously-connected subdomain.
Scroll down to Access Policies and press the Select existing policies button and check the policy you just created and then hit the Confirm button. You should see something like the following

Finally you can configure which login methods you want to support. Out of the box, Cloudflare supports one-time PIN as a login method. Any user who lands on the domain in question the first time will be prompted to enter their email and, to verify the user is who they say they are, they’ll be sent a PIN number to that email address which they’ll then need to enter. This is straightforward, and if that’s all you want, accept the current default settings.
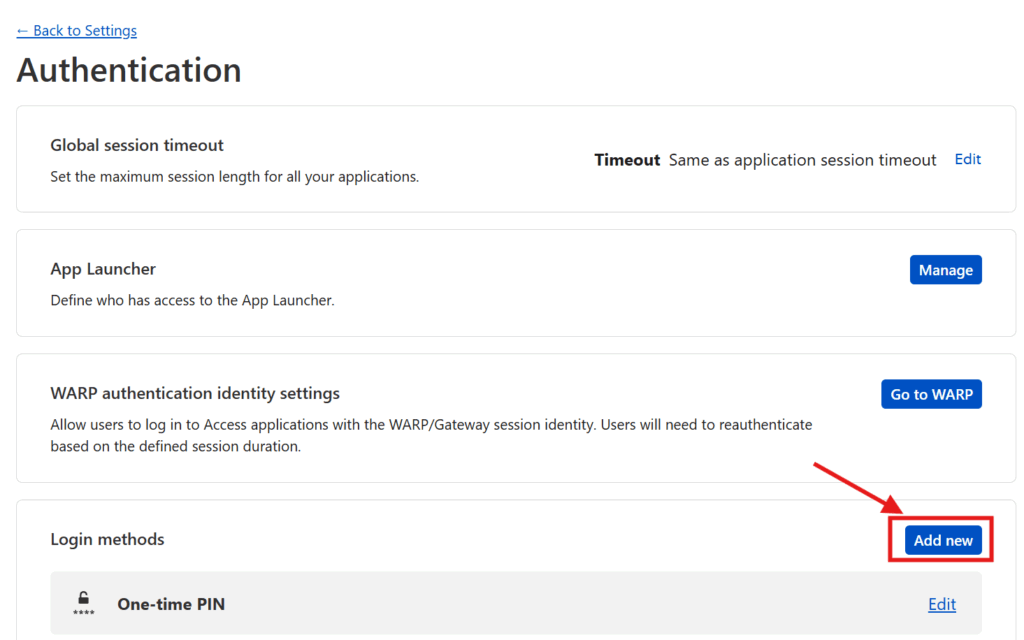
However, if, like me, you prefer to have your users login via a 3rd party authentication service (like Google or Facebook), then you have a little bit of extra work to do. Press the Manage login methods link where you’ll be taken to a screen in a new tab to configure your Authentication options. Where it says Login methods, press the Add new button.
You’ll be given the ability to add support for 3rd party logins through a number of identity providers (see below).
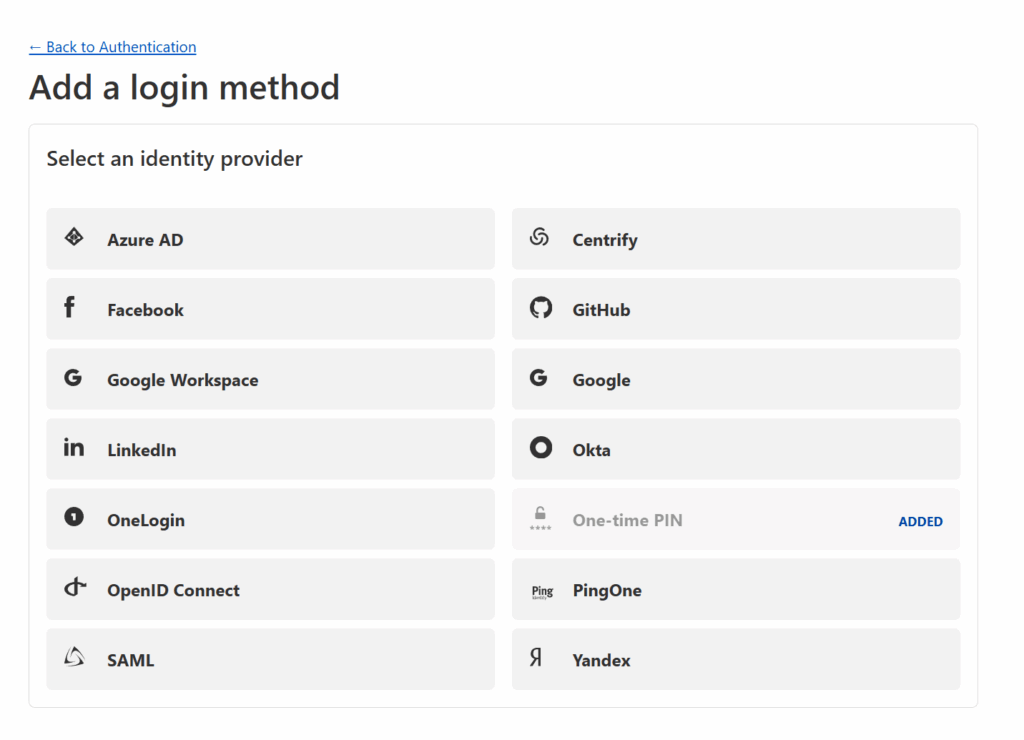
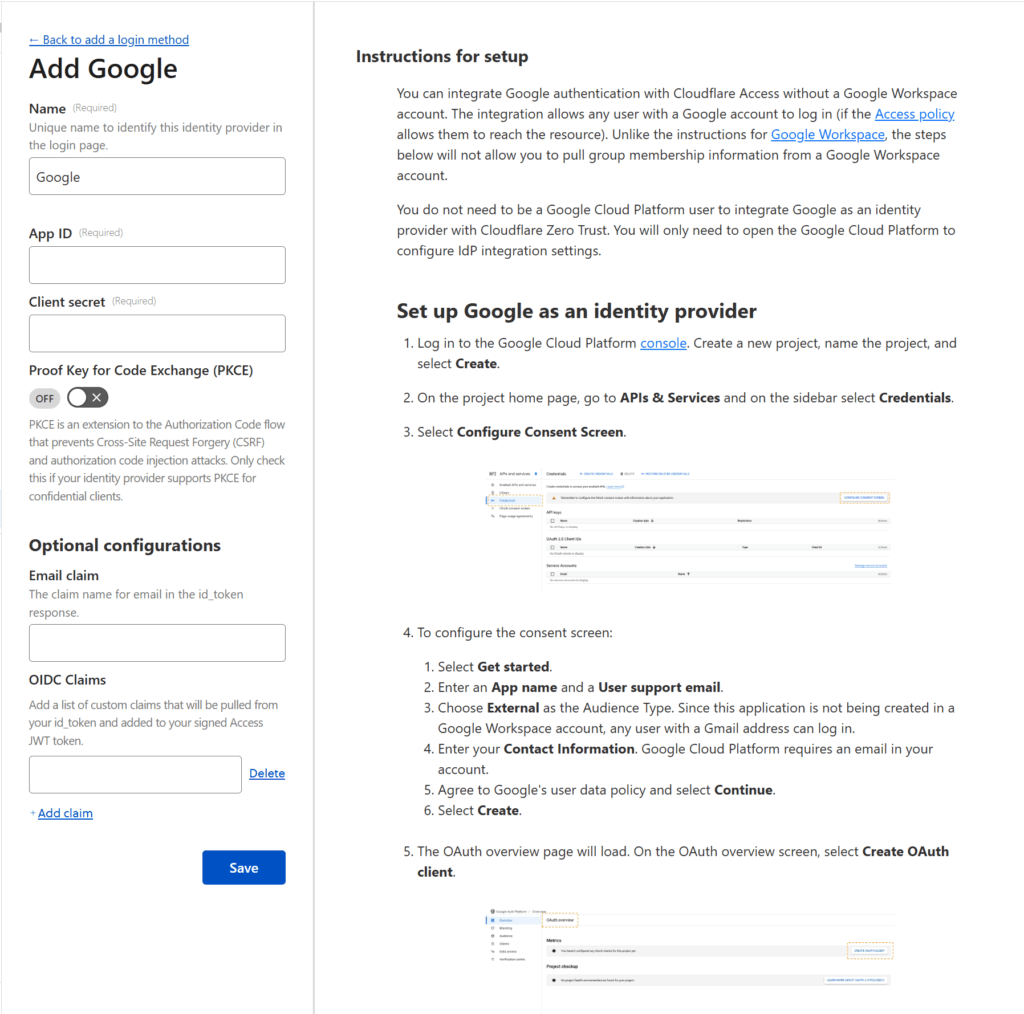
You can select any identity provider you wish — I went with Google — but whatever you select, Cloudflare will provide instructions for how to connect that provider to Cloudflare Zero Trust. These instructions can be quite complicated (see the Google instructions below) but if you follow Cloudflare’s instructions, you should be fine.
Once you’re done, press the Save button and return to the tab where you were configuring the application.
Under Login methods you should see that Cloudflare has checked the Accept all available identity providers toggle. You can keep that option, but as I configured only want my users to use Google, I unchecked that toggle and un-selected the One-time PIN option. I also checked the Instant Auth option (only available if there’s only one authentication method selected) which skips the authentication method selection step for your users. Then I pressed Next

The next two screens have additional optional configuration options which you can skip through by pressing Next and Save. Et voila! You have now configured an authentication and access control system on top of your now publicly accessible web service. Repeat this process for every service you want to put authentication & access control on and you’ll be set!
I have a few services I share access to with my wife and a few that are just for myself and so I’ve configured two access policies which I apply to my services differently. For services I intend to let anyone without access control reach (for example my Plex server for Plex apps), I simply don’t add them as an application in Cloudflare for access control (and just host them via subdomain).
I hope this is helpful for anyone who wants to make their selfhosted services accessible securely through the web. If you’re interested in how to setup a home server on OpenMediaVault or how to self-host different services, check out all my posts on the subject!